uTools插件内网穿透使用教程
uTools插件内网穿透使用教程
原文教程:https://www.yuque.com/xinu/notes/mzagfszkmy1gecaf?singleDoc
准备工作
准备服务器域名
- 一台公网服务器,有公网ip,能通过ssh登录
- 准备一个已备案的域名
设置服务器、安全组
- 直连模式下开放6080、6443、8088三个端口
- nginx部署模式下 开放 80、443、8088三个端口
- 如果代理tcp、udp服务,则额外开放tcp、udp用到的端口
- 还要开启ssh用到的22端口
解析域名
推荐用三级域名做内网穿透映射使用。 这里使用ipx前缀,最终的解析路径如下图
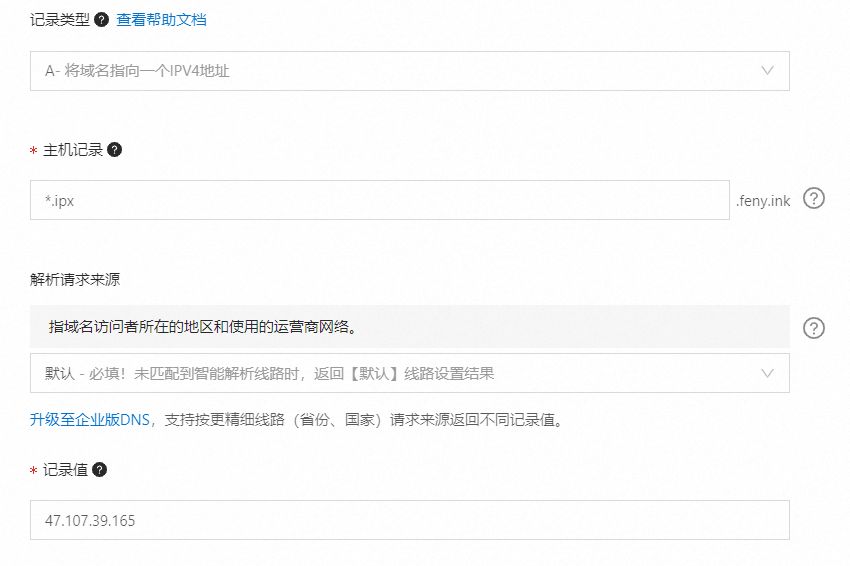
验证解析结果
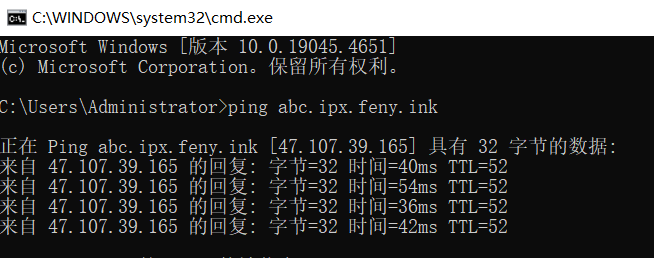
域名 *.ipx.feny.ink 解析到了 47.107.39.165
下载服务端
下载地址: https://github.com/imxiny/easyipx
根据自身需求,选择下载v4还是v3
准备配置文件
下载对应版本的conf.json文件
配置文件内容解释如下,使用的时候请删除注释。下面四种部署方式全部使用此配置文件
{
  "addr": "0.0.0.0", // 无需修改
  "port": 18088, // 通道使用的端口,按需修改
  "token": "dev_test", // 签名使用的token 不要泄露出去
  "tunnel": {
    "tls": true, // 是否开启通道加密。如果设置为true 则下面的两个文件必须配置
    "pem_file": "cert.pem", // 与程序本体的相对路径或绝对路径皆可
    "key_file": "key.pem" // 与程序本体的相对路径或绝对路径皆可
  },
  "http": { // http服务的配置
    "http_port": 16080, // http端口,按需修改
    "https_port": 6443, // https端口,按需修改
    // 请注意,如果是nginx转发的,这里的证书不需要配置,证书配置在nginx上
    "pem_file": "", // https需要的证书, 如果未配置,则https端口不会开通
    "key_file": "", // https需要的证书,如果未配置,则https端口不会开通
    "heartbeat": 0 // 无需修改
  },
  "tcp": {
    "buffer_cache": 32768, // 无需修改
    "port_range": "8900-8950" // 按需修改 按上面开放的端口,所以我们这里设置为 8900-8950
    // 这里的端口范围只是为了方便客户端设置端口,不会全部占用,用到哪个开哪个
  },
  "udp": {
    "keep_time": 7200, // 无需修改
    "health_check": 60, // 无需修改
    "buffer_cache": 32768, // 无需修改
    "port_range": "8951-9000" // 按需修改 按上面开放的端口,所以我们这里设置为 8951-9000
    // 这里的端口范围只是为了方便客户端设置端口,不会全部占用,用到哪个开哪个
  }
}
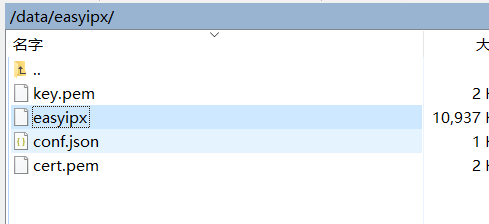
准本工作总结
至此,前期准备工作全部完成,我们有了四个文件,分别是
- easyipx-linux-amd64-4.0.2 服务端程序本体
- conf.json 服务端版本对应的配置文件
- key.pem,cert.pem 自签证书。
有了一台端口放开的服务器 47.107.39.165
一个已经解析好的泛域名 *.ipx.feny.ink
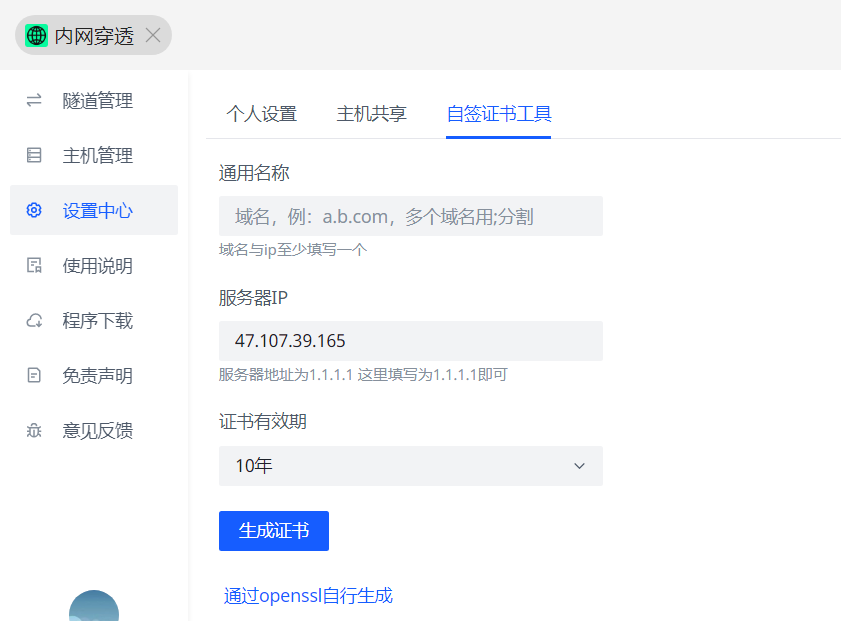
开启通道加密【可选】
conf.json配置通道加密
{
  "tunnel": {
    "tls": true, // 是否开启通道加密。如果设置为true 则下面的两个文件必须配置
    "pem_file": "/data/easyipx/cert.pem", // 与程序本体的相对路径或绝对路径皆可
    "key_file": "/data/easyipx/key.pem" // 与程序本体的相对路径或绝对路径皆可
  }
}
在设置中心生成证书
直连模式部署
# 创建目录 /data/easyipx
mkdir /data/easyipx
# 将服务端软件、配置文件上传至目录 /data/easyipx
上传easyipx-linux-amd64-4.0.2、config.json,并修改easyipx-linux-amd64-4.0.2 名称为easyipx
如果开启了通道加密要把证书文件key.pem、cert.pem一并上传
添加执行权限
# 配置文件已准备好
# 为程序添加执行权限
cd /data/easyipx
chmod +x easyipx
# 启动程序 🚀🚀🚀🚀
# -c 指定配置文件路径,不写的话默认值为当前目录下的conf.json
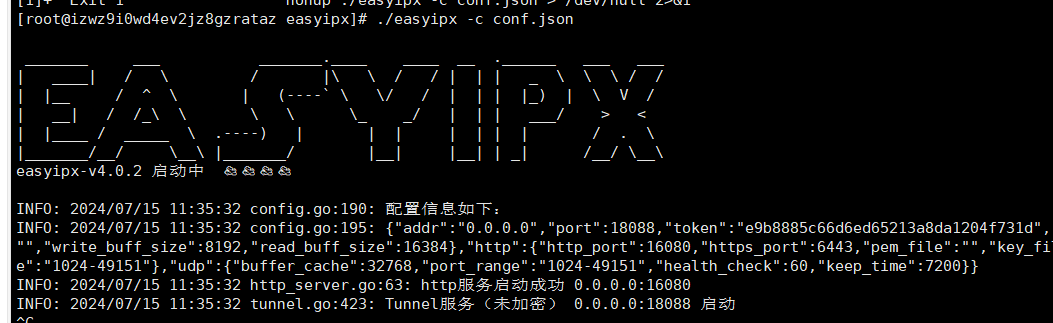
./easyipx -c conf.json
启动成功后 如下图所示
上述启动方式适用于调试阶段,如果成功启动以后,可以使用以下命令,将程序后台运行
nohup ./easyipx -c conf.json > runtime.log 2>error.log &

# 如果不想看运行日志,可以使用如下操作
nohup ./easyipx -c conf.json > /dev/null 2>&1 &
封装成系统服务
创建文件
# 创建文件
touch /usr/lib/systemd/system/easyipx.service
修改文件
vim /usr/lib/systemd/system/easyipx.service内容如下
[Unit]
Description=easyipx daemon
After=syslog.target network.target
Wants=network.target
[Service]
Type=simple
ExecStart=/data/easyipx/easyipx -c /data/easyipx/conf.json
Restart= always
RestartSec=1min
[Install]
WantedBy=multi-user.target
重载配置、启动服务
# 重载配置
systemctl daemon-reload
# 开机自启
systemctl enable easyipx.service
# 启动服务
systemctl start easyipx.service
# 停止服务
systemctl stop easyipx.service
# 重启服务
systemctl restart easyipx.service

# 查看运行状态
systemctl status easyipx.service
# 查看日志
journalctl -u easyipx.service
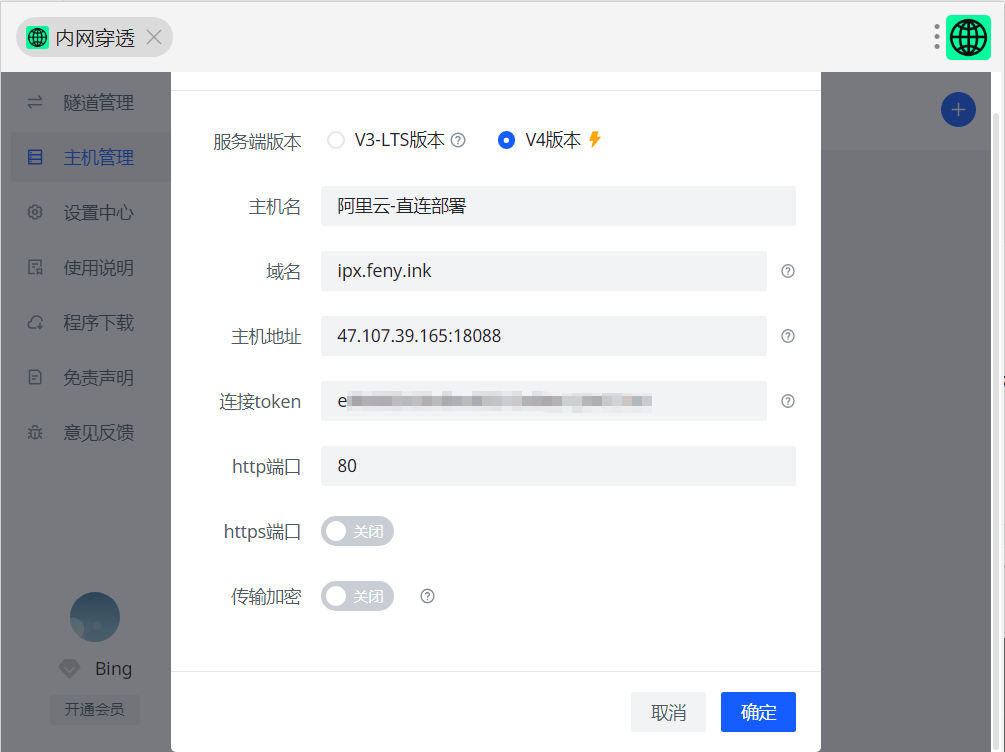
插件添加主机
主机地址:
47.107.39.165为公网IP地址,18088端口为conf.json配置的通道地址http端口:
16080为conf.json配置的http端口
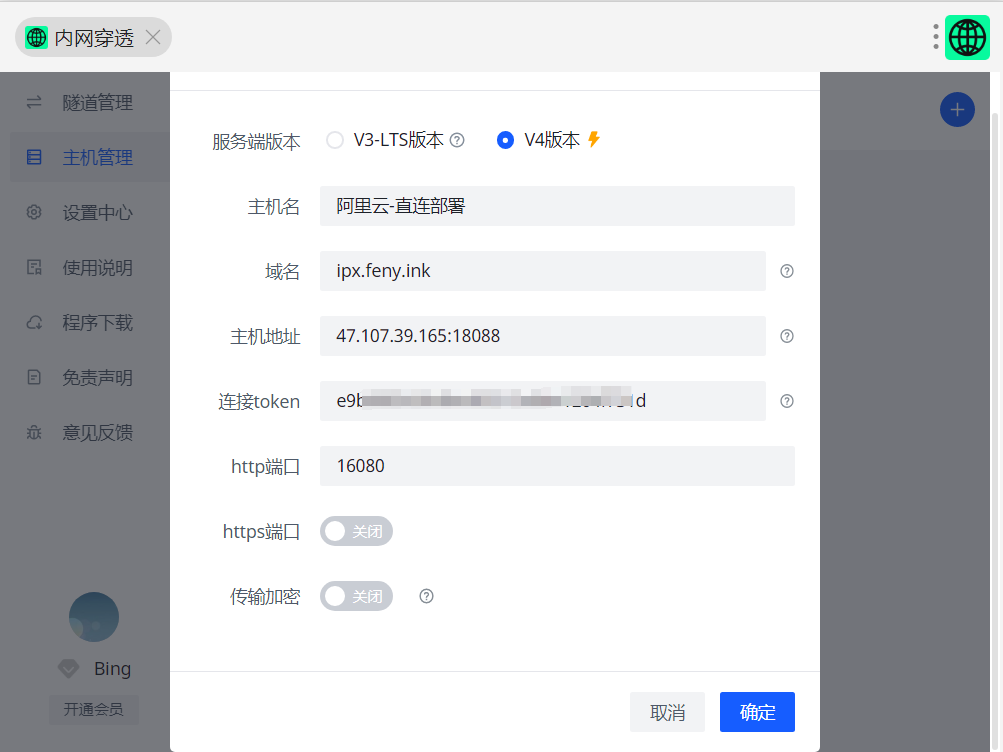
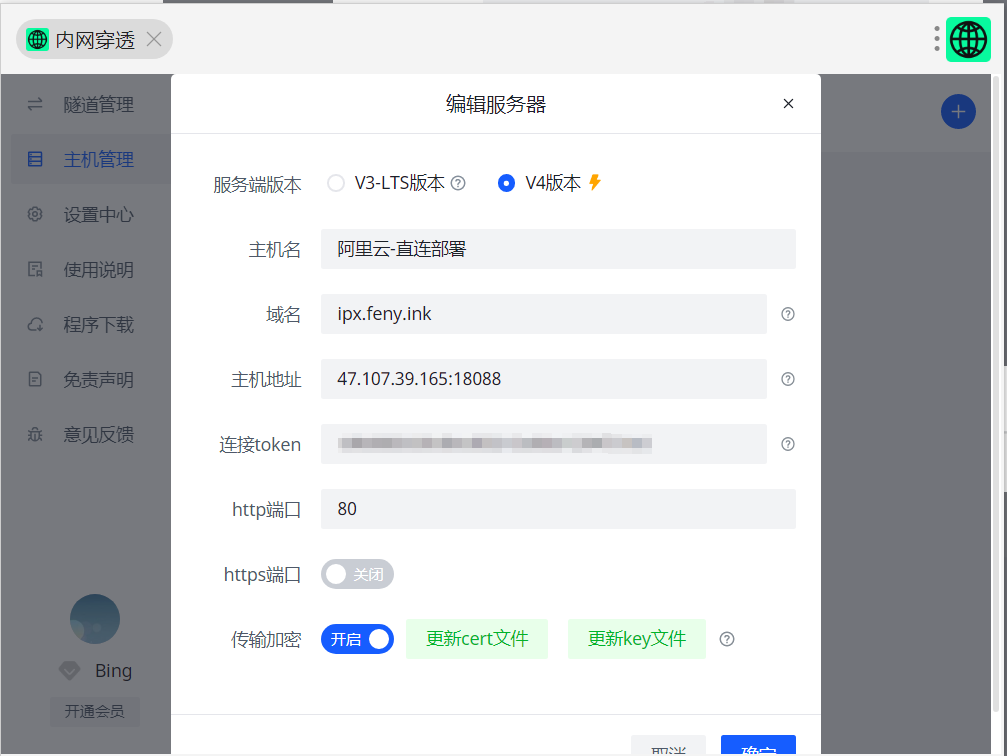
如果开启在conf,json开启通道加密,添加主机时要开启传输加密按钮,并上传证书
添加成功后 如下图所示
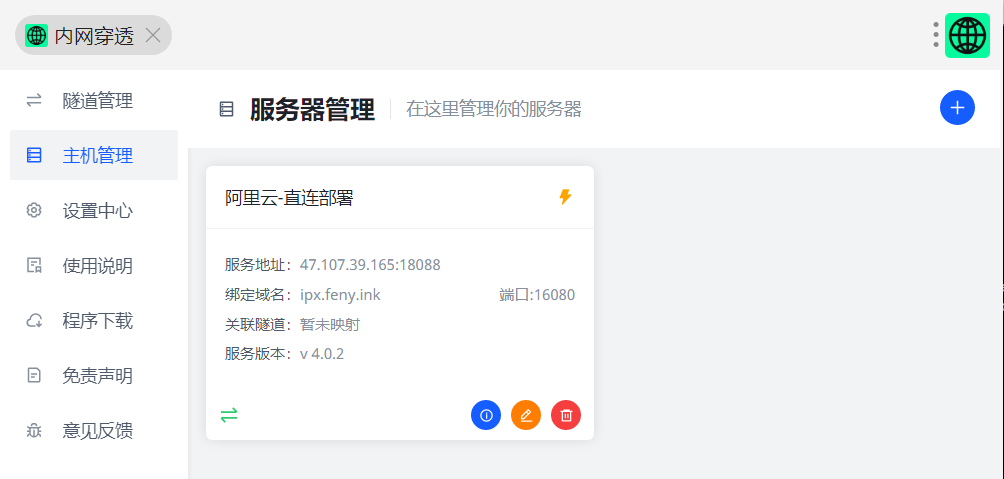
直连方式部署完成。
Nginx代理部署
创建反向代理
在Nginx中添加转发到easyipx的配置
server {
  listen 80;
  server_name *.ipx.fney.ink;

	# 转发到easyipx
	location / {
		proxy_pass http://127.0.0.1:16080; # 反向代理目标地址
		proxy_cache off;
		proxy_set_header Host $host; # 设置请求头
		proxy_set_header X-Real-IP $remote_addr; # 设置真实IP头
		proxy_set_header X-Forwarded-Host $host;
		proxy_set_header X-Forwarded-Port $server_port;
		proxy_set_header X-Forwarded-For $proxy_add_x_forwarded_for; # 设置转发头
		proxy_set_header X-Forwarded-Proto $scheme; # 设置转发协议头
		proxy_redirect http://$host/ http://$host:$server_port/;
		proxy_http_version 1.1;
		proxy_set_header Upgrade $http_upgrade;
		proxy_set_header Connection "upgrade";
		proxy_read_timeout 7200;
	}


	location ~ .*\.(gif|jpg|jpeg|png|bmp|swf)$
	{
	   expires      30d;
	   error_log /dev/null;
	   access_log /dev/null;
	}

	location ~ .*\.(js|css)?$
	{
	   expires      12h;
	   error_log /dev/null;
	   access_log /dev/null;
	}
}
重启Nginx
插件添加主机
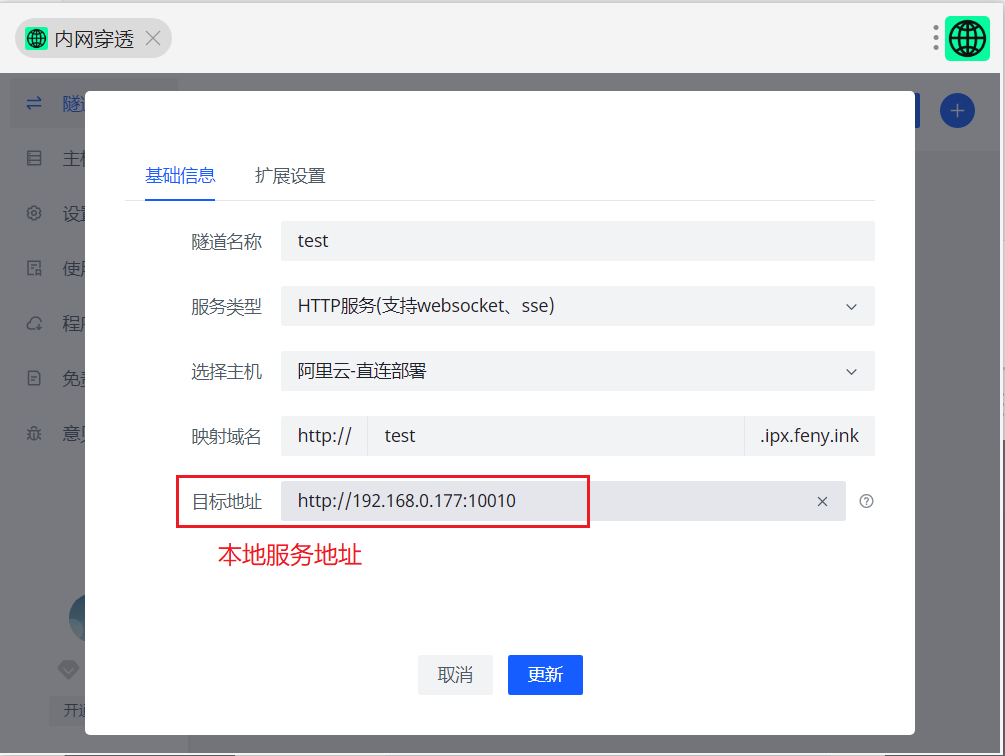
添加隧道
启动本地要内网穿透的服务,如IntelliJ IDEA启动一个SpringBoot服务,请求地址为http://192.168.0.177:10010
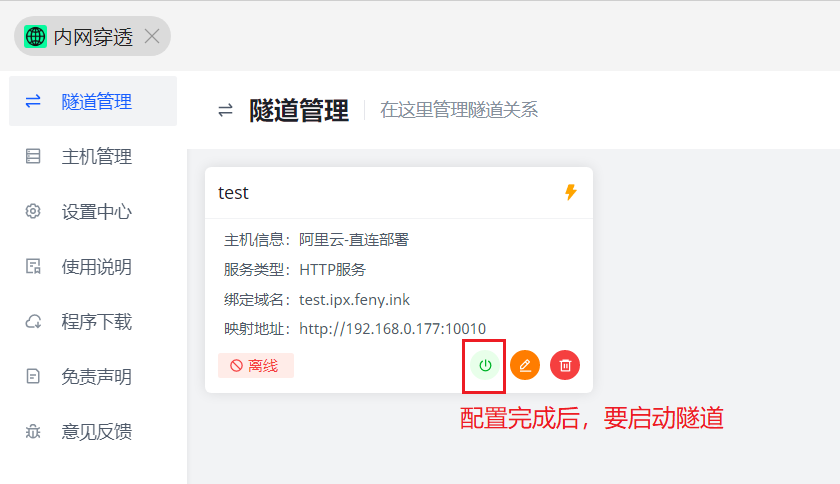
启动隧道
隧道添加完成后,启动隧道
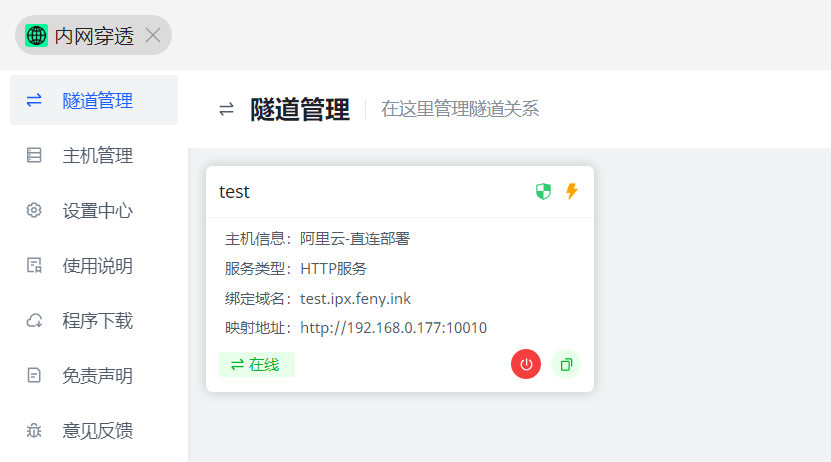
启动完成后即可外网访问内网的服务地址,外网访问地址为:
- 如果为直连模式:http://test.ipx.feny.ink:16080
- nginx代理模式:http://test.ipx.feny.ink